Friday, August 30, 2013

Preserved Grape Leaves

The house next door to us has sold.  Sadly, the couple with a little girl that wanted to buy it didn't get it.  Instead, it's destined to be a rental again.  The new owner has replaced the roof and torn out all the carpeting.  I'm hopeful he'll be a conscientious landlord as he stops by frequently to check in on the house.  The previous owner was an absentee landlord who lived in CA and whose brother lived some 40 miles away.  The plan was to move into the house after her son graduated from high school.  Riiiiight.  From what we saw, the plan was to continue accepting rent money but not to pay the mortgage or do a damn thing about upkeep.

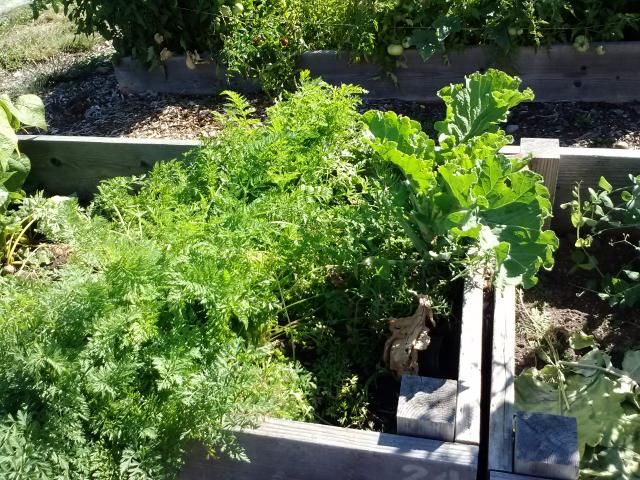
The massive arbor that threatens to take over our house is still there, weighed down by grapes, honeysuckle, climbing roses, and something else I don't know.  We have to keep a close eye on the grapes, lest they go through another overnight growth spurt and finish their attempts to remove all of the gutters from our house.

Arg.

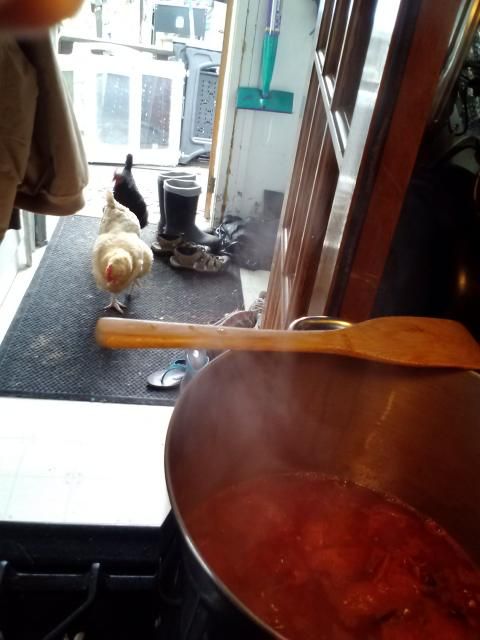
But they're a free source of grapes for our hens, and grape leaves for us.  The invasive grape plant needs to be put to good use, so I'm going to pick some leaves from my side of the fence (NOT STEALING, PEOPLE, NOT STEALING!!) and preserve them for winter dolmades.

OMG.  Grape leaves are expensive!

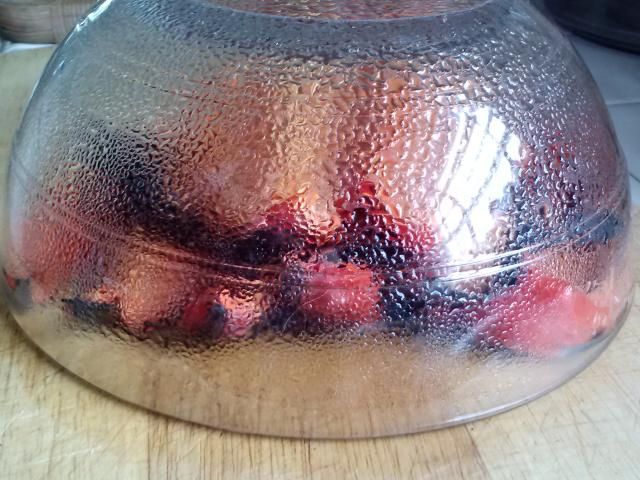
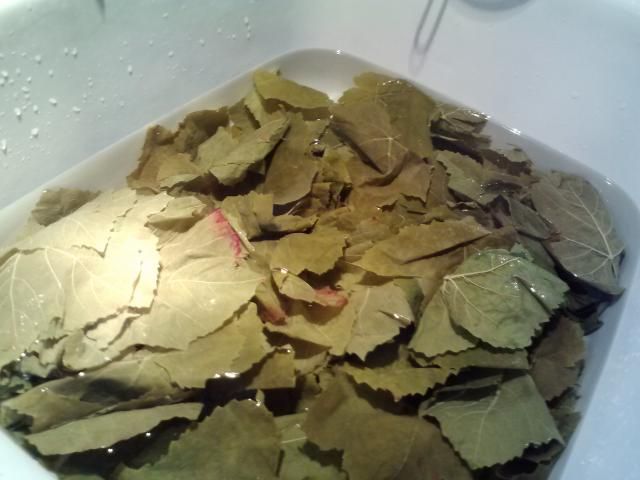
I was glad to have washed the grape leaves before I went to the next step of blanching them.
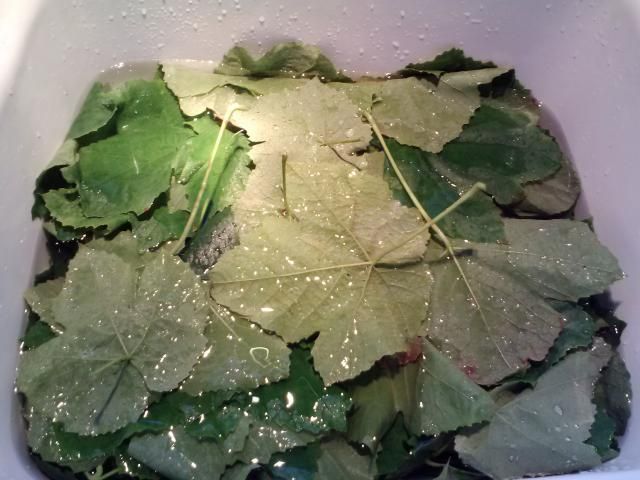
Washed
Blanched - note color change
 

Preserved Grape Leaves (from about.com)

Ingredients:
30 grape leaves per pint
Salt
1/4 cup fresh lemon juice per pint
 
Preparation:
  1. Bring a pot of water to a boil and add enough salt to make it taste like the sea.
  2. Bring a canning kettle or other large pot of water to a boil.
  3. Fill a large bowl with ice water.
  4. Dip the grape leaves in the boiling salt water for 30-45 seconds, then drop them into the ice water to cool. Drain them once all the leaves are fully cool.
  5. Working with about 6 grape leaves at a time and roll them up from the side.
  6. Pack the rolled up leaves into the jar (you will likely need to fold one of the ends down to make them fit), leaving at least 1/2 inch of head space at the top of the jar.
  7. Bring 1 cup of water to a boil and add the lemon juice. Boil for a minute or two, then pour over the grape leaves to cover them.
  8. Clean the edges of the jar and seal the jar. Process for 15 minutes in a boiling water bath. Let cool and store in a cool, dark place for up to 6 months.
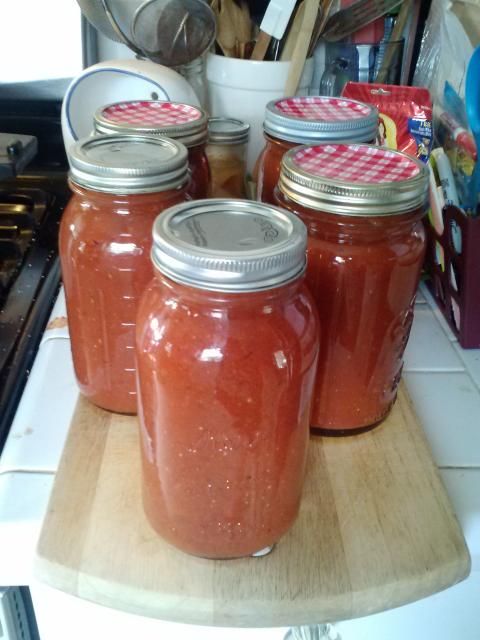
Once they're processed, they look like, well, leaf cigars in a jar.  Not pretty but, let's hope, tasty.  I'll post a follow-up recipe this fall when I use them to make dolmas or dolmades.  Do you have a favorite stuffed grape leaves recipe?

Thursday, August 29, 2013

Peacock feathers

A few years ago I went to the Madrona Fiber Arts Festival, where I found a gorgeous hand-crafted, made in the USA, mohair & baby alpaca, teal lace weight yarn.

I visited it for 3 days straight - I work just a few blocks from the venue - before shelling out the $45 to take that precious skein home with me.

Then I poured over patterns on Ravelry.com for months.  I knew what I was looking for: a lace shawl that featured peacock feathers as its motif.

Nope.

Nope.


Nope.

But getting closer.  The same designer had this one, the Peacock Feathers Stole.  A good friend gifted me with the pattern after I hesitated over the cost ($12 at the time!!).

I got to work and loved the pattern.  It was interesting and gorgeous and easy (relatively) to work.

Then I hit row 215.  Row 217 would. not. line. up.  Frustrated, I pulled it out and tried again.  Then again.  Then I put it in timeout for a few months.  Tried again.  And again.  Another year (or more) of timeout passed due to Christmas presents, hosting an exchange student, mothering a toddler, and my tendency to taking a break from knitting during the summer months.

My cousin is getting married on 12/31 and I want to wear the stole to her wedding.  Yesterday was my birthday.  With a solid day to myself and a free coffee from Starbucks, I packed up the naughty stole and staked out a spot at a Starbucks that's halfway to my favorite yarn store.  That way I was close to some expert help if needed.

Or maybe Yellow House would sell the yarn on consignment if I got really fed up.

It took me over three hours to try to figure out the mistakes, rip back to my lifeline, and then carefully knit back through to The Really Awful Row: #217.  I counted, double-counted, and made sure I'd done things correctly.

Last night it seemed that I had finally gotten it right.  Tonight, provided I can get some time of absolute silence, I'll take the project out of purgatory and attempt row 219.

Because I'm a one-at-a-time knitter, my following project, for which I already have the pattern, yarn, and antique buttons, will be this.  It looks easy in comparison.

But this morning a friend - the same one who gifted me with the above pattern - sent me a link to this.

Darn yarn enablers.

Wednesday, August 28, 2013

Birthday

Happy birthday to me!
Happy birthday dear Jennnnnnnnnnnn!
Happy birthday to me!

Tuesday, August 27, 2013

Roasted tomato soup

The other day I was as sick as a dog.  I spent half of the day curled up on the couch in intense pain while Kaelen tore the house apart, and the other half I slept.

Muscles aching from a day of doing nothing, the next day I was on a preserving and canning tear.

I eased into my preserving marathon with preserved lemons.  As far as preserving goes, that's about as easy as it gets.

Next up were the black beans I'd been meaning to can ever since I bought a hugemongous bag of them on super duper clearance.  It's so cheap to buy dried beans and can them for easy use later. 

Becky and Joe Baker, Waller Road Farms owners
After that, Kaelen and I ran to my favorite farm stand (Waller Road Farms, FYI), and picked up a case of canning tomatoes, along with some figs and a couple of other things I hadn't intended to buy.  I'd seen David Lebovitz' recipe for roasted tomato soup and felt inspired.  I remembered Karen from The Art of Doing Stuff had a recipe for smoked tomato soup, so checked that one out for additional ideas.

Later that day I went to a community canning group and helped put up some 36 jars of dilly beans.  I took home 6 for us.  When I got home I whipped up a batch of raspberry ice cream, as well as the mix for peanut butter chocolate ice cream.  My birthday is coming up and we're throwing a party featuring homemade ice cream and toppings.

At my limit, I went to bed, dreams of preserved foods dancing in my head.

Roasted Tomato Soup
Makes 5 quarts
I developed this recipe following the guidelines for tomato and vegetable juice blend at the National Center for Home Food Preservation.  Lemon juice is required even if you pressure can this soup.  The chipotle makes this subtly smoky and adds a hint of spice but isn't enough to make you dive for milk.  Omit it if you don't care for chipotle.

22 pounds tomatoes, halved
2 onions, quartered
2 heads of garlic, tops cut off
3 bell peppers
2 chipotle peppers canned in adobo sauce (optional)
6-7 springs of fresh thyme
3 bay leaves
2 tbsp kosher salt, or to your taste
1/2 cup sugar, or to your taste

Put the tomatoes cut-side down on a jelly pan.  Cook at 400 degrees until the skin is blistered and turning dark brown.  Roast onions and garlic with the tomatoes as space allows.  This took 3 batches about 25 minutes each in my convection oven.  I was able to do 2 batches at once, turning to ensure even roasting.

While the tomatoes are roasting, blacken and remove the skins of the red peppers.  I did mine on the grill, though I suppose you could do them with the tomatoes as well.

Remove the garlic from the skins after roasting.
Blackened bell peppers steaming under glass

Place the tomatoes, garlic, onions, bell peppers, and chipotle in a large stock pot and cook for half an hour.  Don't worry about chopping anything up.

Remove from heat and puree the tomato mixture using your method of choice (stick blender, regular blender, or food processor).  If you desire a smooth tomato soup, run your puree through a food mill to remove large skin pieces and seeds.  You can dehydrate the solids and use them in other things as a flavor enhancer.

Return the puree to the stock pot, add the thyme and bay leaves, and season to your taste with the salt and sugar.
Shoo out the mooching chickens as necessary.
Pureed soup
Follow the directions at the NCHFP website to can using your preferred method.  You may also freeze the soup using these directions.

Final product: 5 quarts of perfect tomato soup
To punch up the umami of this soup, serve it with a float of sour cream, half-and-half, or milk.

Kaelen tested the soup...

...but was overtired and didn't appreciate all the work I'd put into his lunch.

Sunday, August 25, 2013

Cornichons

It's canning season.  I'm not putting up as much as I have in the past but the canners have still preserved a variety of things for the winter months.

I've already put up green beans, a whole slew of strawberry items, and some peach jam that I found in the freezer when our fridge went kaput.  I've got enough pickles left over from previous summer canning binges to last at least another year.  Still on the docket for this fall are dilly beans, sauerkraut, preserved grape leaves, applesauce, tomatoes, and cornichons.


Cornichons are French pickles traditionally made with tarragon instead of dill.  Maybe you're seen the above jar at the grocery store.  They run about $8 a pint, if you can even find them.

Pâté, cheese plates, raclette, and fondu would each be incomplete, naked even, without cornichons.  My French host mother once made a delicious dish of skate with cornichons in a brown butter sauce.  (Here's Dorie Greenspan's version.  You could use any delicate white fish in lieu of skate... trout, perhaps?)

Unsatisfied with the cornichons recipes I was finding on google.com, I put my French degree to work and turned to google.fr.  I found this:
Pour 1 bocal d'un litre : essuyer les cornichons, les mettre dans le bocal avec 1 verre de vin blanc sec, quelques grains de poivre, de coriandre, 1 clou de girofle, 1 brin d'estragon, 3 morceaux de sucre. Compléter avec du vinaigre d'alcool.
The ingredients listed are vinegar, white wine, peppercorns, coriander, cloves, tarragon, and sugar.  That sounds more like it! 

It's a pretty drive to and in the Puyallup Valley.
Finding the two principle ingredients was a bit of a wild goose chase.  I drove out to Duris Cucumber Farm in Puyallup last Saturday late in the afternoon.  I have tender memories of driving to Duris with my mom and grandma when I was a young child.  There was always a skunk that had met an untimely end along the busy road that leads to Duris, and I will forever associate that odor with Puyallup's rural roads.  Sadly - ?? - you rarely encounter that skunk stench any more due to development.
Puyallup, WA
I could smell this field of dill before I saw it!
Duris had every size cuke imaginable...
...except the size I'd wanted.

I went back first thing this morning to assure that I had my pick of the harvest.  Duris is the only place in the South Sound that I know of which sells graded pickling cucumbers.  You can see the grading process here.

Tarragon was somewhat easier.  I pestered my boss for some.  He wasn't sure if he had any, then I went on vacation for a few days.  A quick facebook plea garnered a response from a friend who runs a community garden, telling me I was welcome to some of theirs.  The tricky part there was to find it.
Kaelen "helped" me look for the tarragon.

It took me a while to find it tucked away.  Can you spot it?
Ingredients in hand, I went home to put the kiddo down for a nap and get going on my cornichons. 

Here's my recipe, this time in English and with measurements and directions.

Cornichons - makes 3 pints
50 extra small cucumbers, scrubbed
2 cups + 2 cups white vinegar
1/8 cup + 1/3 cup pickling salt
2 1/4 tsp white sugar
3 tsp light mustard seeds
1.5 tsp dark mustard seeds
1.5 tsp peppercorns
6 whole cloves
3 bay leaves
3 sprigs tarragon

1 cup white wine
3 1-pint jars
OPTIONAL: pearl onions, peeled (I used cippolini because that's what I could find.)


Into each pint jar, put 3/4 tsp sugar, 1 tsp light mustard seeds, 1/2 tsp dark mustard seeds, 1/2 tsp peppercorns, 2 cloves, 1 bay leaf, and 1 tarragon sprig.  Set aside.

Place the cucumbers in a large bowl.  Bring 2 cups vinegar and 1/8 cup pickling salt to a boil.  Mix until the salt is dissolved, then pour over the cucumbers.  Allow to sit for 2-8 hours, then rinse the cucumbers and discard the brine.  (This step helps ensure a crunchy pickle.)

Bring the remaining 2 cups vinegar, white wine, and 1/3 cup salt to a boil.  Stir until salt dissolves.

Divide the cucumbers evenly between the 3 pint jars, leaving 1/2" headspace if canning.  Toss in the onions if you're doing them.  Top off the jars with the fresh vinegar-wine brine.  Process like gherkins to make shelf stable or store them in the fridge.

Store the pickles in a cool, dark place for 3-4 weeks before digging in.

Thursday, August 22, 2013

Loafing about

Gene's working at an architectural salvage store for the summer.  I love ratting around in places like this.  Last week I went for a visit and spied these in the corner.

They're old EKCO commercial bread pans.  I texted my cousin who is a baker back in Massachusetts, asking if she wanted one.  She was slightly excited.  The thread went like this:

Me: Want long or short pans?
Her: Yes
Me: Pick ONE
Her: I can have all?  Lol
Me: Turd
Her: Love you.
Me: Love you, too.
Her: Long.  No short.
Me: You'll get what I give you!
Her: Lol (My fiance) and Dad keep thinking I'm saying pants and the conversation is getting insane.

Then she sent me a picture of a dessert she's developing.

Yeah, I'm drooling, too.

Gene picked up the long pans for my cousin, and a set of the short ones for me.  He paid just $13 for the two sets!

Now to figure out how to mail the big ones to her.  They're surprisingly heavy.

What should I make first with mine?

Wednesday, August 21, 2013

Cart thief

It started so innocently.
I put 2 pluots into the cart with Kaelen.  At first he paid them no attention.  Then he picked them up and held them for a few minutes.

But then there was a nibble, which led to a gleeful wiggle.

Those nibbles gave way to outright gobbling.  Look at that dribble on his chin.

Note that we're still in line but he's eaten considerably more.

I bought 4 more of them due to his reaction to the sweet fruit.  I have to say that the employees were really nice about the toddler scarfing this juicy pluot.

"You may NOT take my deliciousness away, Mommy!"

I never did find that pit.

Tuesday, August 20, 2013

Green Cauliflower with Preserved Lemons

Three things led up to this recipe.

1.
I was chatting with someone the other day about preserved lemons.  She didn't know what to do with them.  I gave her some ideas and then forgot about the conversation.

2.
A few days later I was at the grocery store, where I spotted some green cauliflower.  It was the same price as the white stuff, so into my cart it went for us to try (for the record, it tastes the same).

3.
Gene and I have been on a Master Chef kick.

When I went to make dinner last night, I dreaded the thought of plain old steamed cauliflower with what was otherwise a pretty tasty dinner.  I started to raid my cupboards and came up with this recipe.  I hope you enjoy it as much as we did.  It went together in about 5 minutes.  It would be tasty on any veggie.  Add some garlic and increase the olive oil for a marinade.

Preserved Lemon & Cilantro Sauce (ever-so-slightly inspired by this recipe)
1 preserved lemon, rinsed and pulp removed
2 tablespoons olive oil
1/2 teaspoon pepper
1/2 cup fresh cilantro
1 tablespoon honey

Whirl everything in a blender until a thick paste forms.  Spoon the sauce into the bottom of a large bowl.  Add hot veggies and toss to coat.

Not too shabby, eh?

Sunday, August 18, 2013

Roasted Cherry Tomato Salad

Sometimes I buy fruit and vegetables like they're going out of style, forgetting that our family of three can only eat so many cherry tomatoes, strawberries, basil, or melons before we're sick and tired of them.

Enter Costco cherry tomatoes, stage right.  A girlfriend was over for coffee the other and noticed my carton of tomatoes on the kitchen table.  I said that I wasn't sure what to do with them.  She said she'd recently seen a recipe in Bon Appetit that roasted tomatoes and put them in a salad.

Inspired, that's exactly what I did.  It was perfect for an impromptu BBQ later that day.


Roasted Cherry Tomato Pasta Salad (inspired somewhat by Ina Garten's recipe)
2 pounds of cherry tomatoes
Salt & pepper
Olive oil
Pesto (I used about 2/3 cup freshly made)
1/2 cup crumbled goat cheese (fresh mozzarella would also be delicious)
1 pound bite-sized pasta of your choice

Put the tomatoes on a rimmed cookie sheet, sprinkle with olive oil, salt, and pepper.  Toss to coat.  Roast in a 325-degree oven for about 30 minutes, or until the tomatoes have split open.

Cook & drain the pasta according to instructions.

Mix the pasta, tomatoes, and pesto while everything is still warm.  Once the mix has cooled to room temperature, toss in the cheese.  Adjust seasonings to your taste.

I enjoyed the leftovers the next morning with my Sunday paper and the dog at my feet.

Friday, August 16, 2013

Blueberry Dumplings

When I was in grade school I spent a summer with my dad's family in Massachusetts.  My great-grammie lived a few blocks away from my grandparents, so my brother and I would walk over to visit her to visit her from time to time.  Now that I'm a mother, I understand that my visits to Great-Grammie probably gave my Gram and Gramp a nice break from our youthful energy and sibling squabbles.

I'd had a great-grandma in Washington, an ancient woman in a nursing home who had suffered decades of illnesses.  Spending time with a member of my great-grandparents' generation was such a novelty.  I recall wanting to be close to her, to get to know her and spend time with her, to explore her home.  I like to think that she enjoyed getting to know me, too, as I was one of the oldest great-grandkids.  Age has a way of sneaking up on each of us and I bet that being a great-grandmother may have posed itself as somewhat of a novelty to her as well.

One day my brother and I went over for lunch.  Great-Grammie had made blueberry dumplings for dessert.  I remember them bubbling away on her stove top, a forbidden thing nobody could touch until they were done.  When it came time for dessert on that muggy afternoon, she spooned the thick, sticky, sweet syrup over fluffy dumplings.  The dumplings were white in the middle but stained purple and green along the edges.  I loved them instantly.

Great-Grammie died some years later, before I was able to return for another visit.  That afternoon is my most vivid memory of her.

Now, nearly 30 years later, blueberry dumplings bring back sharp memories of sitting at a kitchen table with a feisty little woman who was my Great-Grammie.  They're my New England/Nova Scotia version of madeleines in tea.

Here's her recipe as written in her daughter's - my gram's - hand.  I've had a lifetime of deciphering her handwriting so will type it out for you under the picture.


Because I can't resist tinkering with recipes, I did the unthinkable and added some lemon zest and a little cinnamon.  I'd like to think that Great-Grammie would have approved.  But maybe not.

Blueberry Dumplings
Sauce:
1 quart blueberries
1/2 cup sugar
2/3 cup water
Zest of 1 small lemon
1/4 teaspoon cinnamon
Bring blueberries, water, sugar, lemon, and cinnamon to a boil in a medium-sized pot with a tight-fitting lid.  Prepare dumpling dough while the sauce is heating.

Dumplings: (from NPR.org, or use Bisquick per my gram's recipe)
2 cups flour
1 teaspoon sugar
2 teaspoons baking powder
3/4 teaspoon salt
1/2 cup cold butter
6-8 tablespoons milk
Mix together the flour, sugar, salt, and baking power in a food processer.  Cut in the cold butter until the mixture resembles coarse crumbs.  Gently mix in milk by hand until it becomes a very soft dough.

Divide the dough into 5 portions and gently drop into the bubbling blueberries.  Place lid on the pot and allow to steam for 12 minutes.  Do not open!

Top the dumplings and sauce with heavy cream or vanilla ice cream.

Tuesday, August 13, 2013

More Strawberries

Oh.  Did you think I was done with strawberries?

I had nearly 4 flats.  That's 36 pounds of strawberries.

Yes, I made the requisite strawberry jam.  Actually, I made 2 batches.

As I was hulling - and hulling and hulling and hulling - the strawberries, I realized that I had a ton of tops that could go to better use than to feed a flock of old hens.  I'm such a Yankee at heart that I couldn't let them go to waste.

See the copper pan in the upper left?  That's a strawberry shrub!

I've been thinking about shrubs a lot lately, remembering my obsession with them when I was pregnant.  I pulled out my vinegar, threw in 4 cups of strawberry tops whose leaves I'd removed, and cooked it for about 15 minutes.

I can't wait to get some club soda on the way home tonight and have something different with dinner.

Strawberry Shrub
The important thing about a shrub is the ratio of 1:1:1.

3 cups strawberries, sliced
3 cups vinegar
3 cups sugar*
(*Please note an earlier version said water.  There is no water in this recipe.  Dangit.)

Combine the vinegar and berries in a pot and bring to a boil.  Cook for 15 minutes.  Strain, then add the sugar and stir well.

If desired, process for 5 minutes with 1/8" headspace, or simply store in the fridge.  These, too, will go to my barter.


Tonight I have to make another batch of jam and figure out what to do with the last bowl of berries that are languishing.  Perhaps more BBQ sauce?

Monday, August 12, 2013

Strawberry Overload

It started last week with this Facebook post by Tacoma Boys, a fruit stand turned gourmet grocery store across town.

I bought one flat.  We had only bought a single flat of Puyallup strawberries this year because at $22 each we couldn't afford more than that.

Once I got home, Gene encouraged me to go back and buy more.  Two days later I went back for two more flats.  What a deal at $7.99 each!  Granted, they weren't local berries but they'd be fine in smoothies and jam.

My car loaded with strawberries (plus blueberries and raspberries from another stand), I headed out to get Kaelen from daycare.  On my way I passed a new store called Harbor Greens, which is owned by a coworker's friend.  I decided to check it out and pick up some meat to grill.  As I parked, this is what I saw:
ARE YOU EFFING KIDDING ME?!?!

So I bought another flat.

I lost a half a pound of strawberries and about half a pint of blueberries during the ride home.

Ummmm.  Now what.

Seriously, there's only so much jam a family of 3 can eat.

"Luckily" (I laugh derisively), our fridge had gone kaput that week.  All of its contents were across town in my dad's freezer.  A brand new, empty freezer was perfect for freezing strawberries.  These trays held about 4 gallon bags' worth.

It's nice to have a stocked freezer again.

But I was still left with nearly 2 flats of berries.  Out came the canning items.  Hey, these flat holders are very convenient!

Off I went to google a recipe for strawberries that was not jam. I don't really like pie, so filling was off the list.  It's possible to can strawberries but the end result is a mushy mess.

Then I found this recipe: Roasted Strawberry BBQ Sauce.
Making a massive mess.  This was awful to clean.
I tripled it and processed the sauce for 15 minutes in a boiling water bath. I'll take it to my next barter event.

Roasted Strawberry BBQ Sauce (recipe adapted slightly from closetcooking.com)
Makes about 5.5 pints.


  • 12 cups strawberries, cut in half
  • 1.5 cups  ketchup
  • 6 tablespoons honey
  • 4 tablespoons strawberry jam 
  • 6 tablespoons balsamic vinegar
  • 6 tablespoons soy sauce
  • 3 chipotle chilis in adobo, chopped
  • 8 cloves of garlic, rough chopped
  • 3 tablespoon ginger, grated
  • 1 tablespoon Worcestershire sauce
  • 1 tablespoon dijon mustard
  • 2 tablespoons cilantro, chopped (optional)

Directions
  1. Place the strawberries in a single layer on a baking pan lined with foil folded up on the sides to capture the juices and roast in a preheated 425F oven until they start to caramelize, about 15-20 minutes.
  2. Bring everything except the cilantro to a boil, reduce the heat, simmer for 15 minutes, remove from heat, mix in the cilantro and puree in a food processor or blender or using an immersion blender.
  3. Process in sterilized jars for 15 minutes.


I'm waiting for the flavors to meld and mellow a bit before I crack open a jar.  I cannot wait.

What would you have made with all these strawberries?